
File specifications
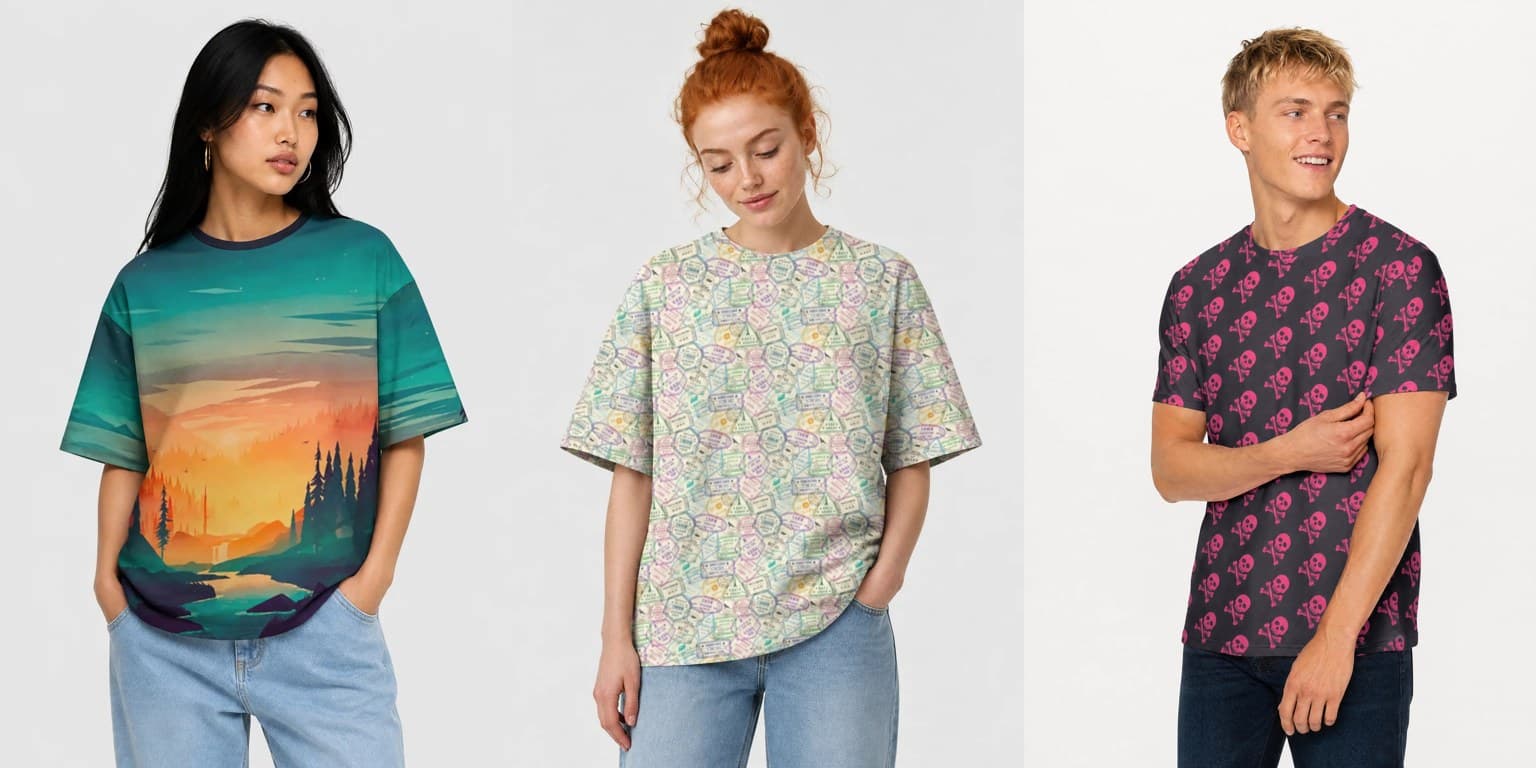
There are two ways to hand us a design, and the difference is not file size. It is how much of the garment you get to decide. Pick the sentence that sounds like you:
- 2 square images, from 1024×1024 px
- minutes of work — we do the layout, tiling and print files
- the back doubles as the sleeves automatically
- 2 full-garment canvases, 8114×8114 px native
- you author the exact layout in your editor
- every panel is yours — including sleeves and collar
Spec A — front & back artwork
Two ordinary square images. This is the path to take when what you care about is the thing on the chest.
Your front image becomes the front panel, and nothing else. That is its whole job, which is why it doesn't need to be huge. Inside it, the area where your character or subject sits can be generous — the front panel is mostly hero.
Your back image becomes the back and the sleeves. This is the part designers get wrong. Because the same image feeds several pieces of the garment, there is no way for you to predict which part of it lands on a sleeve. Put a face or a slogan on it and it may well end up wrapped around an arm.
So in this path the back wants to be a field: a pattern, a texture, a wash of color. Something that reads the same wherever it is cut.
- Square works best. Non-square uploads are center-cropped to a square, so keep your subject centered.
- 1024×1024 px minimum. Smaller files are rejected. Between 1024 and 2048 we sharpen with an upscaler; 2048 and above is used as-is.
- Optional hero subject. Add a third image — a character, a pet, a piece of your art — and we compose it onto the front artwork.
- Front and back are independent. A calm back pattern under a loud front is a classic move, and here it is also the safe one.
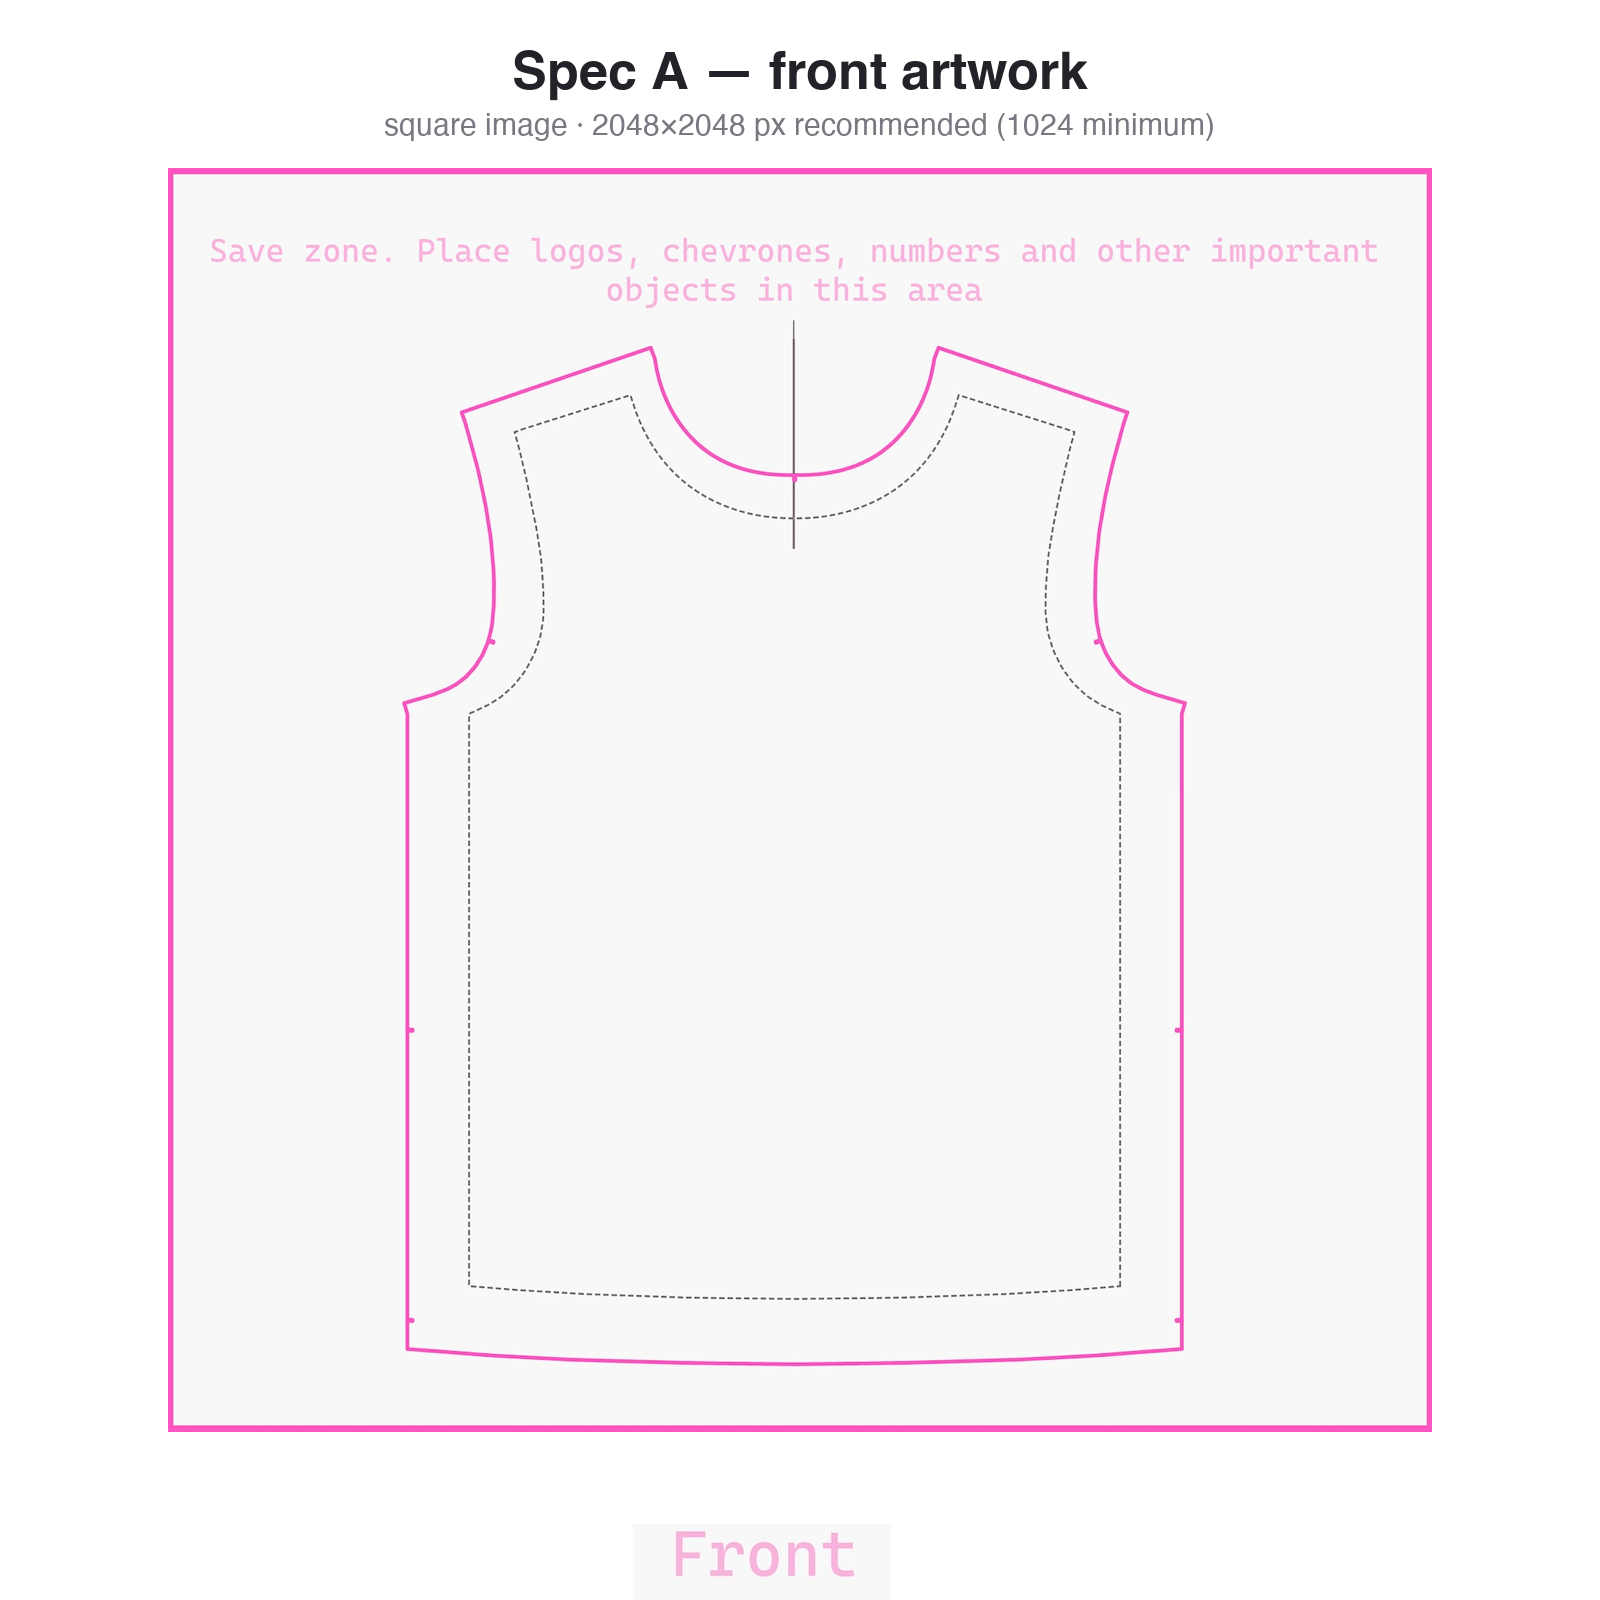
The front image. The hatched strips down each side fold into the seams — the shirt front shows the central 80% of the width. Keep faces, lettering and anything that must survive inside the marked hero zone.
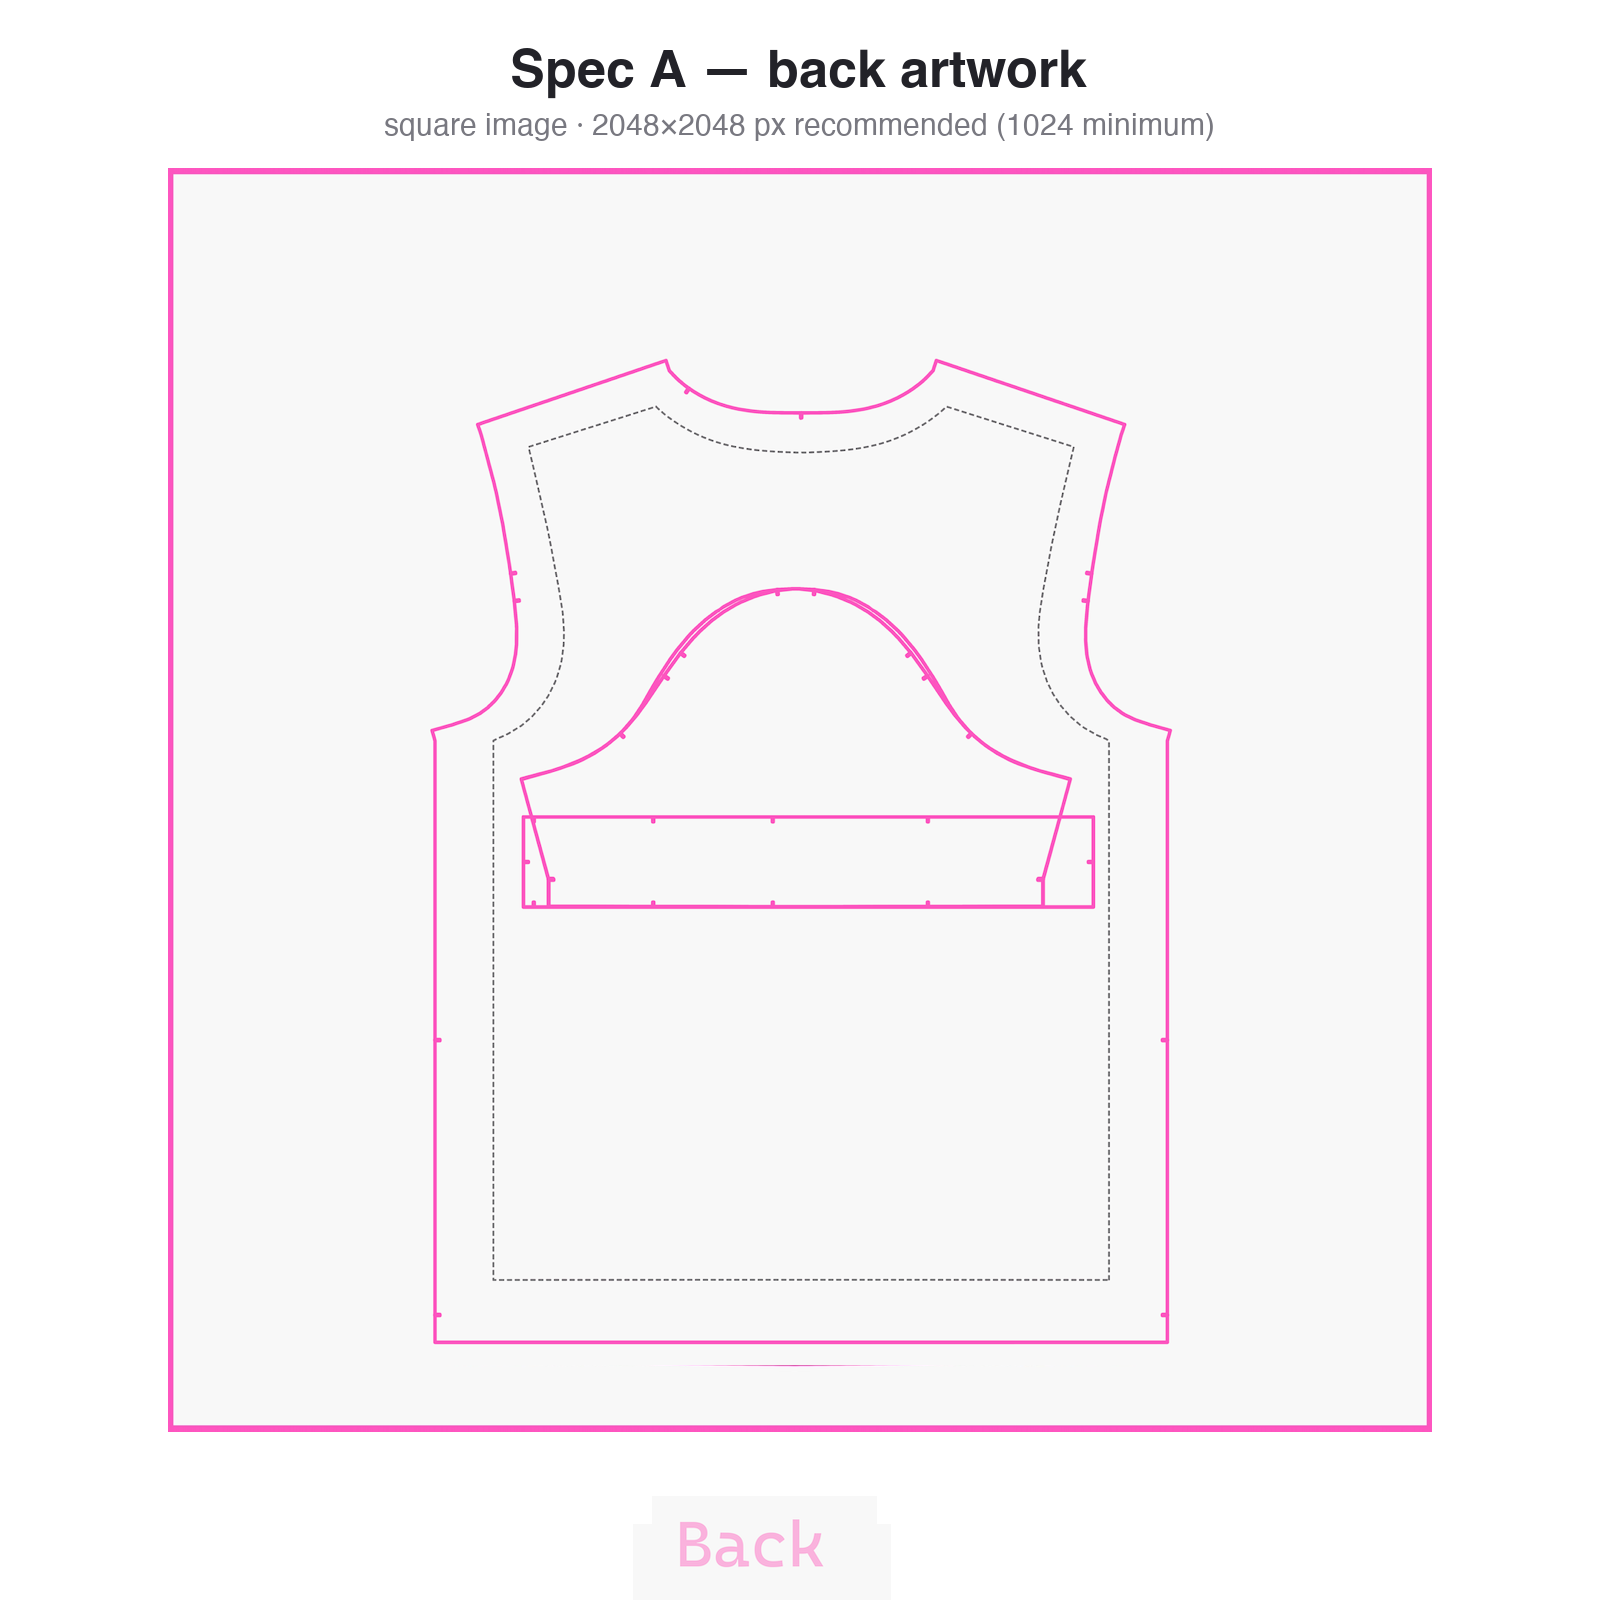
The back image. The ghosted copies around it are the same artwork feeding the sleeves and seam areas — which is why it wants to be seamless, and why nothing you care about should sit at a particular spot on it.
Spec B — print-ready file
A print file is the full-garment layout we send to the printer exactly as you upload it: no cropping, no rework. The whole canvas is reactive-dyed into 100% cotton, edge to edge, and the garment is cut and sewn from that printed fabric afterwards.
The reason to take this path is the sleeves.
From the front canvas we take the front panel, the sleeves and the collar. The panel comes from the dead center — the canvas is large enough that there is room for it — and the sleeves are cut from the areas immediately left and right of it. So if you want lettering running down a sleeve, or a motif landing on a shoulder, this is where you put it, and it goes where you put it.
From the back canvas we take only the back. Nothing from this file travels onto a sleeve. Whatever you place here stays on the back, whole.
- Strictly square. Width must equal height; non-square files are rejected.
- 8114×8114 px native. Files from 4000×4000 px are accepted and normalized up to 8114, but they print with softer detail. For the sharpest result, export at 8114.
- JPEG, up to 100 MB per file. Flat raster, no layers, no guides — exactly what should hit the fabric. Export at quality 90+ — it fits the limit comfortably and prints with no visible difference. Files over the limit are rejected at upload with a clear notice.
- Two files per design. One for the front, one for the back, same canvas rules for both.
Templates
Layout templates for the men’s T-shirt (MT), with the front panel, sleeves and collar positions marked. Build your artwork on top of them, then hide the guide layer and export front.jpg and back.jpg at 8114×8114 px.
- Men’s T-shirt template — PSD, layered, 8114×8114 px
- Men’s T-shirt template — PDF, the same layout as a reference sheet
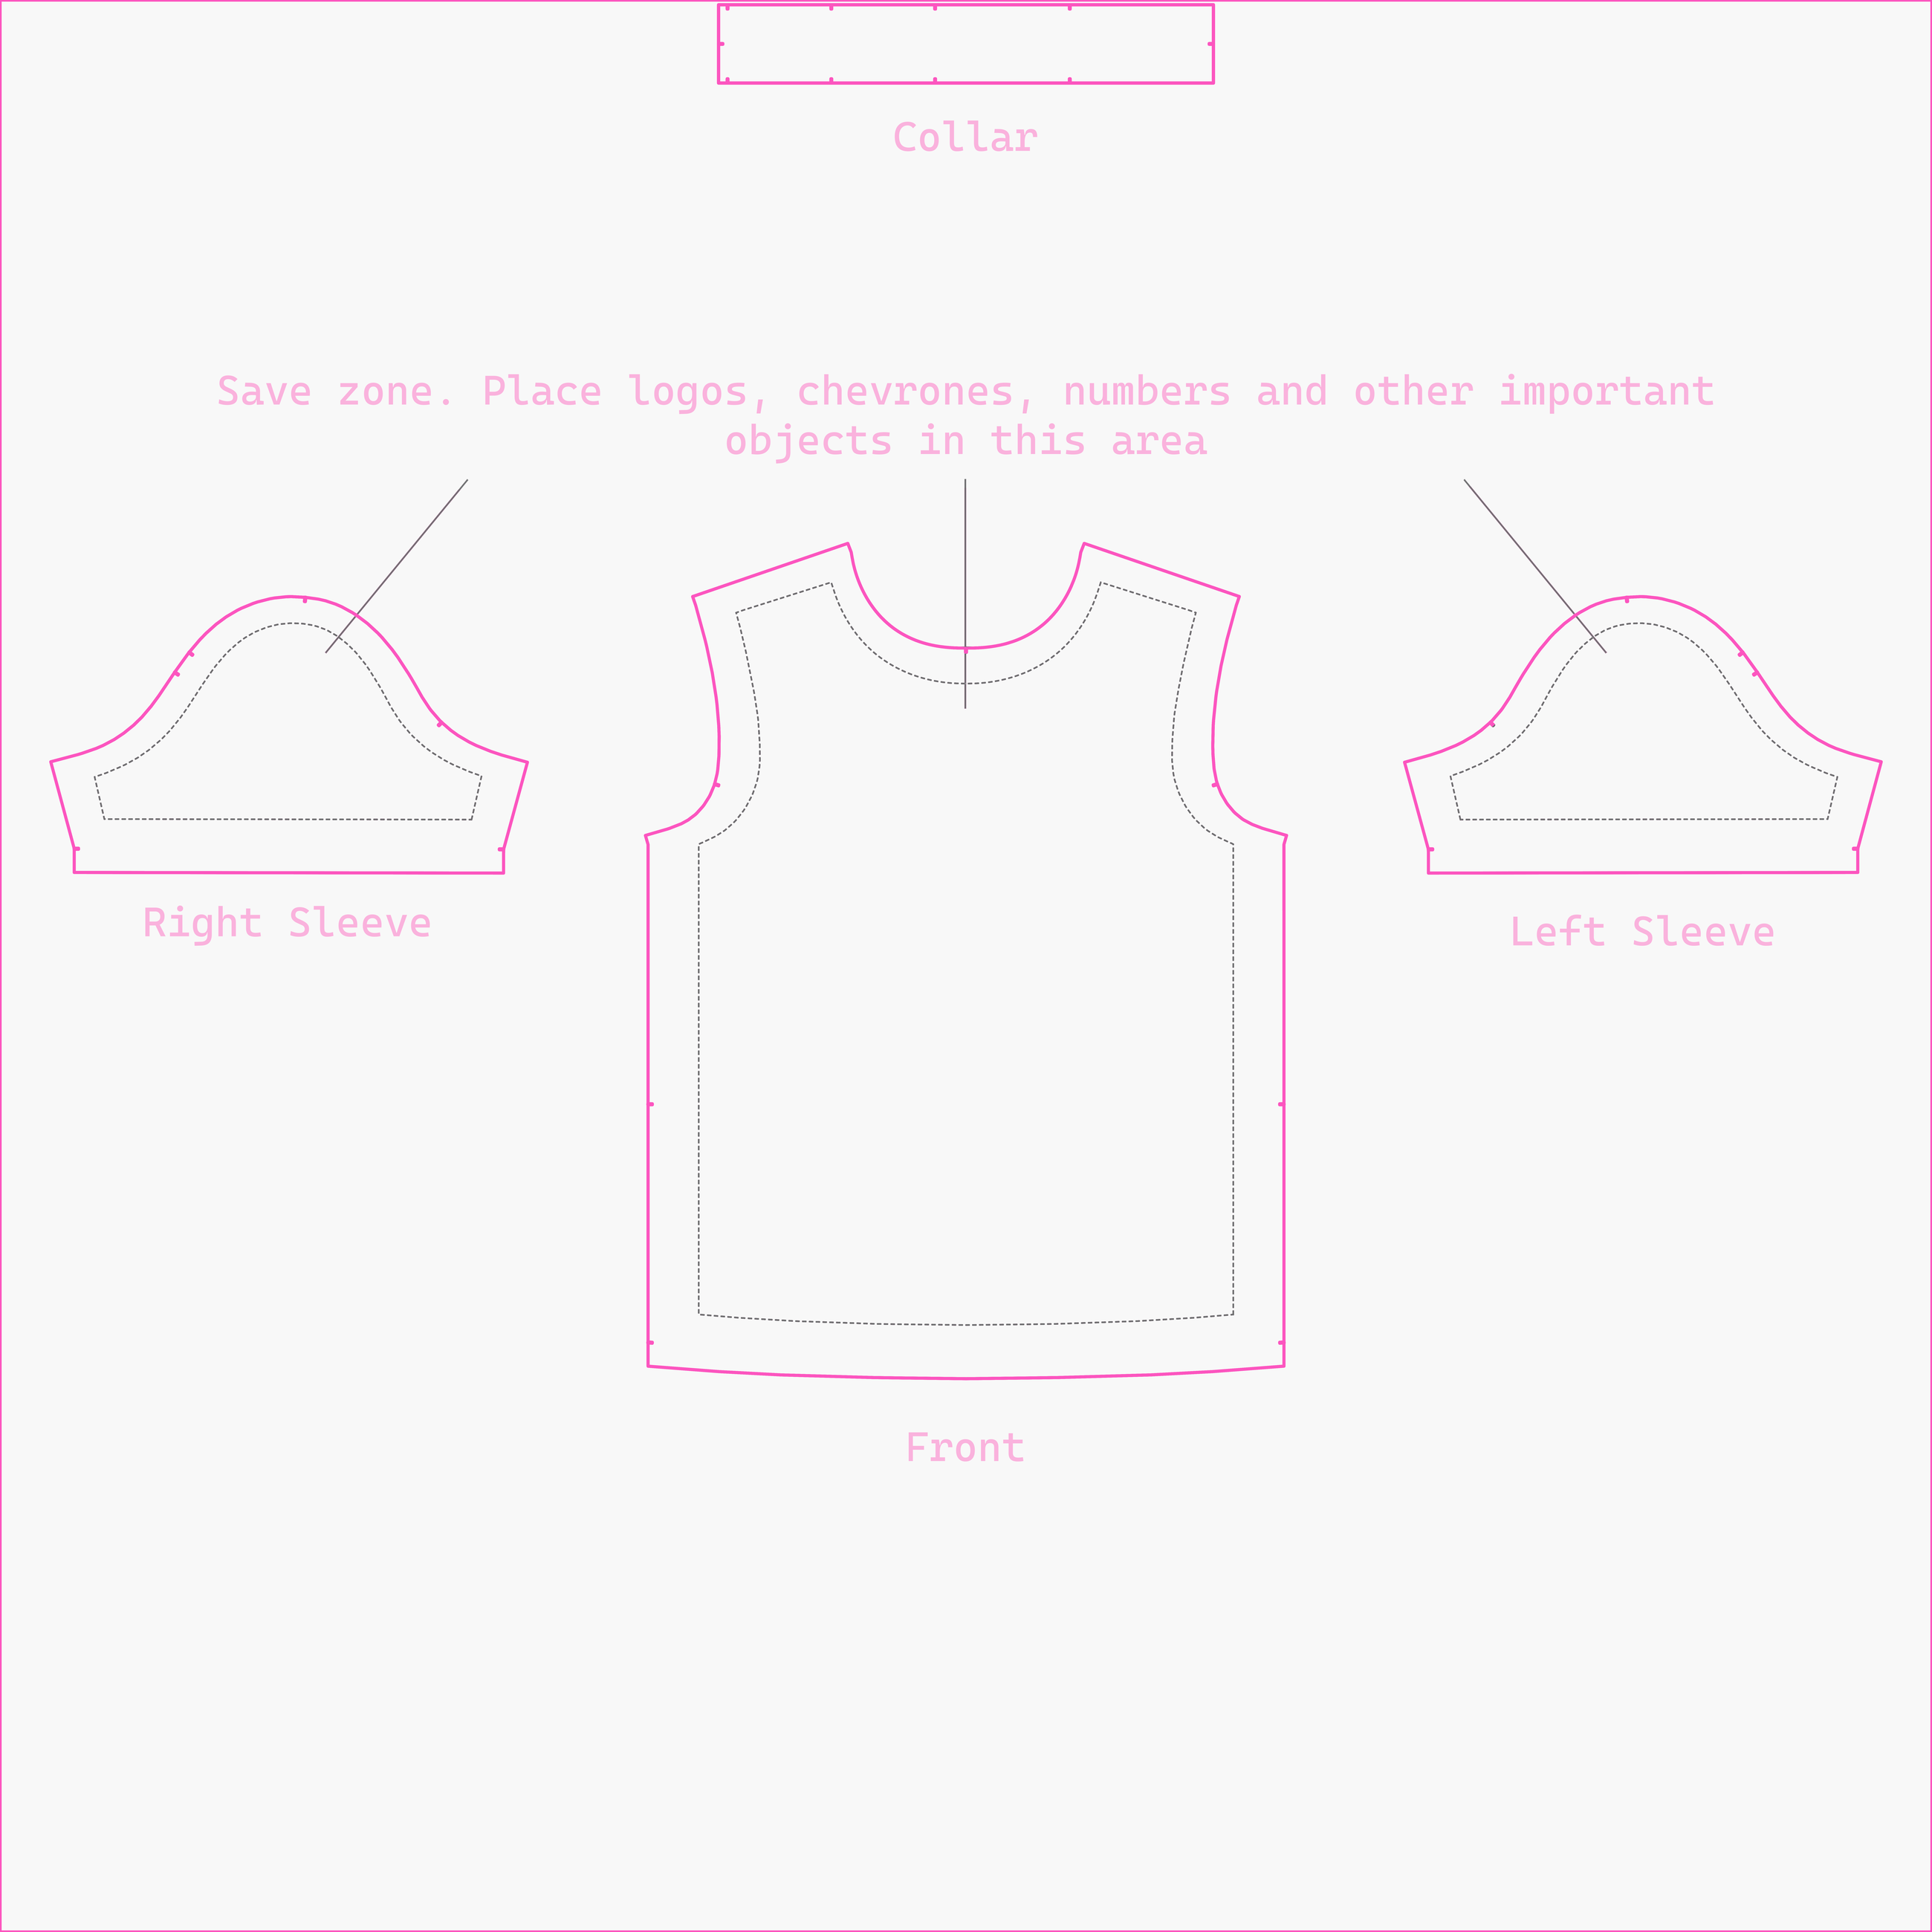
The print-ready front canvas, with the cutting positions marked. The front panel is 3260 × 4096 px at the center and the hero zone inside it is 1962 × 2617 px — smaller than most designers expect. The two sleeves and the collar are cut from the marked areas, which is the whole reason to choose this path. Positions are shown for size M and shift slightly between sizes, so treat them as regions rather than pixel targets.
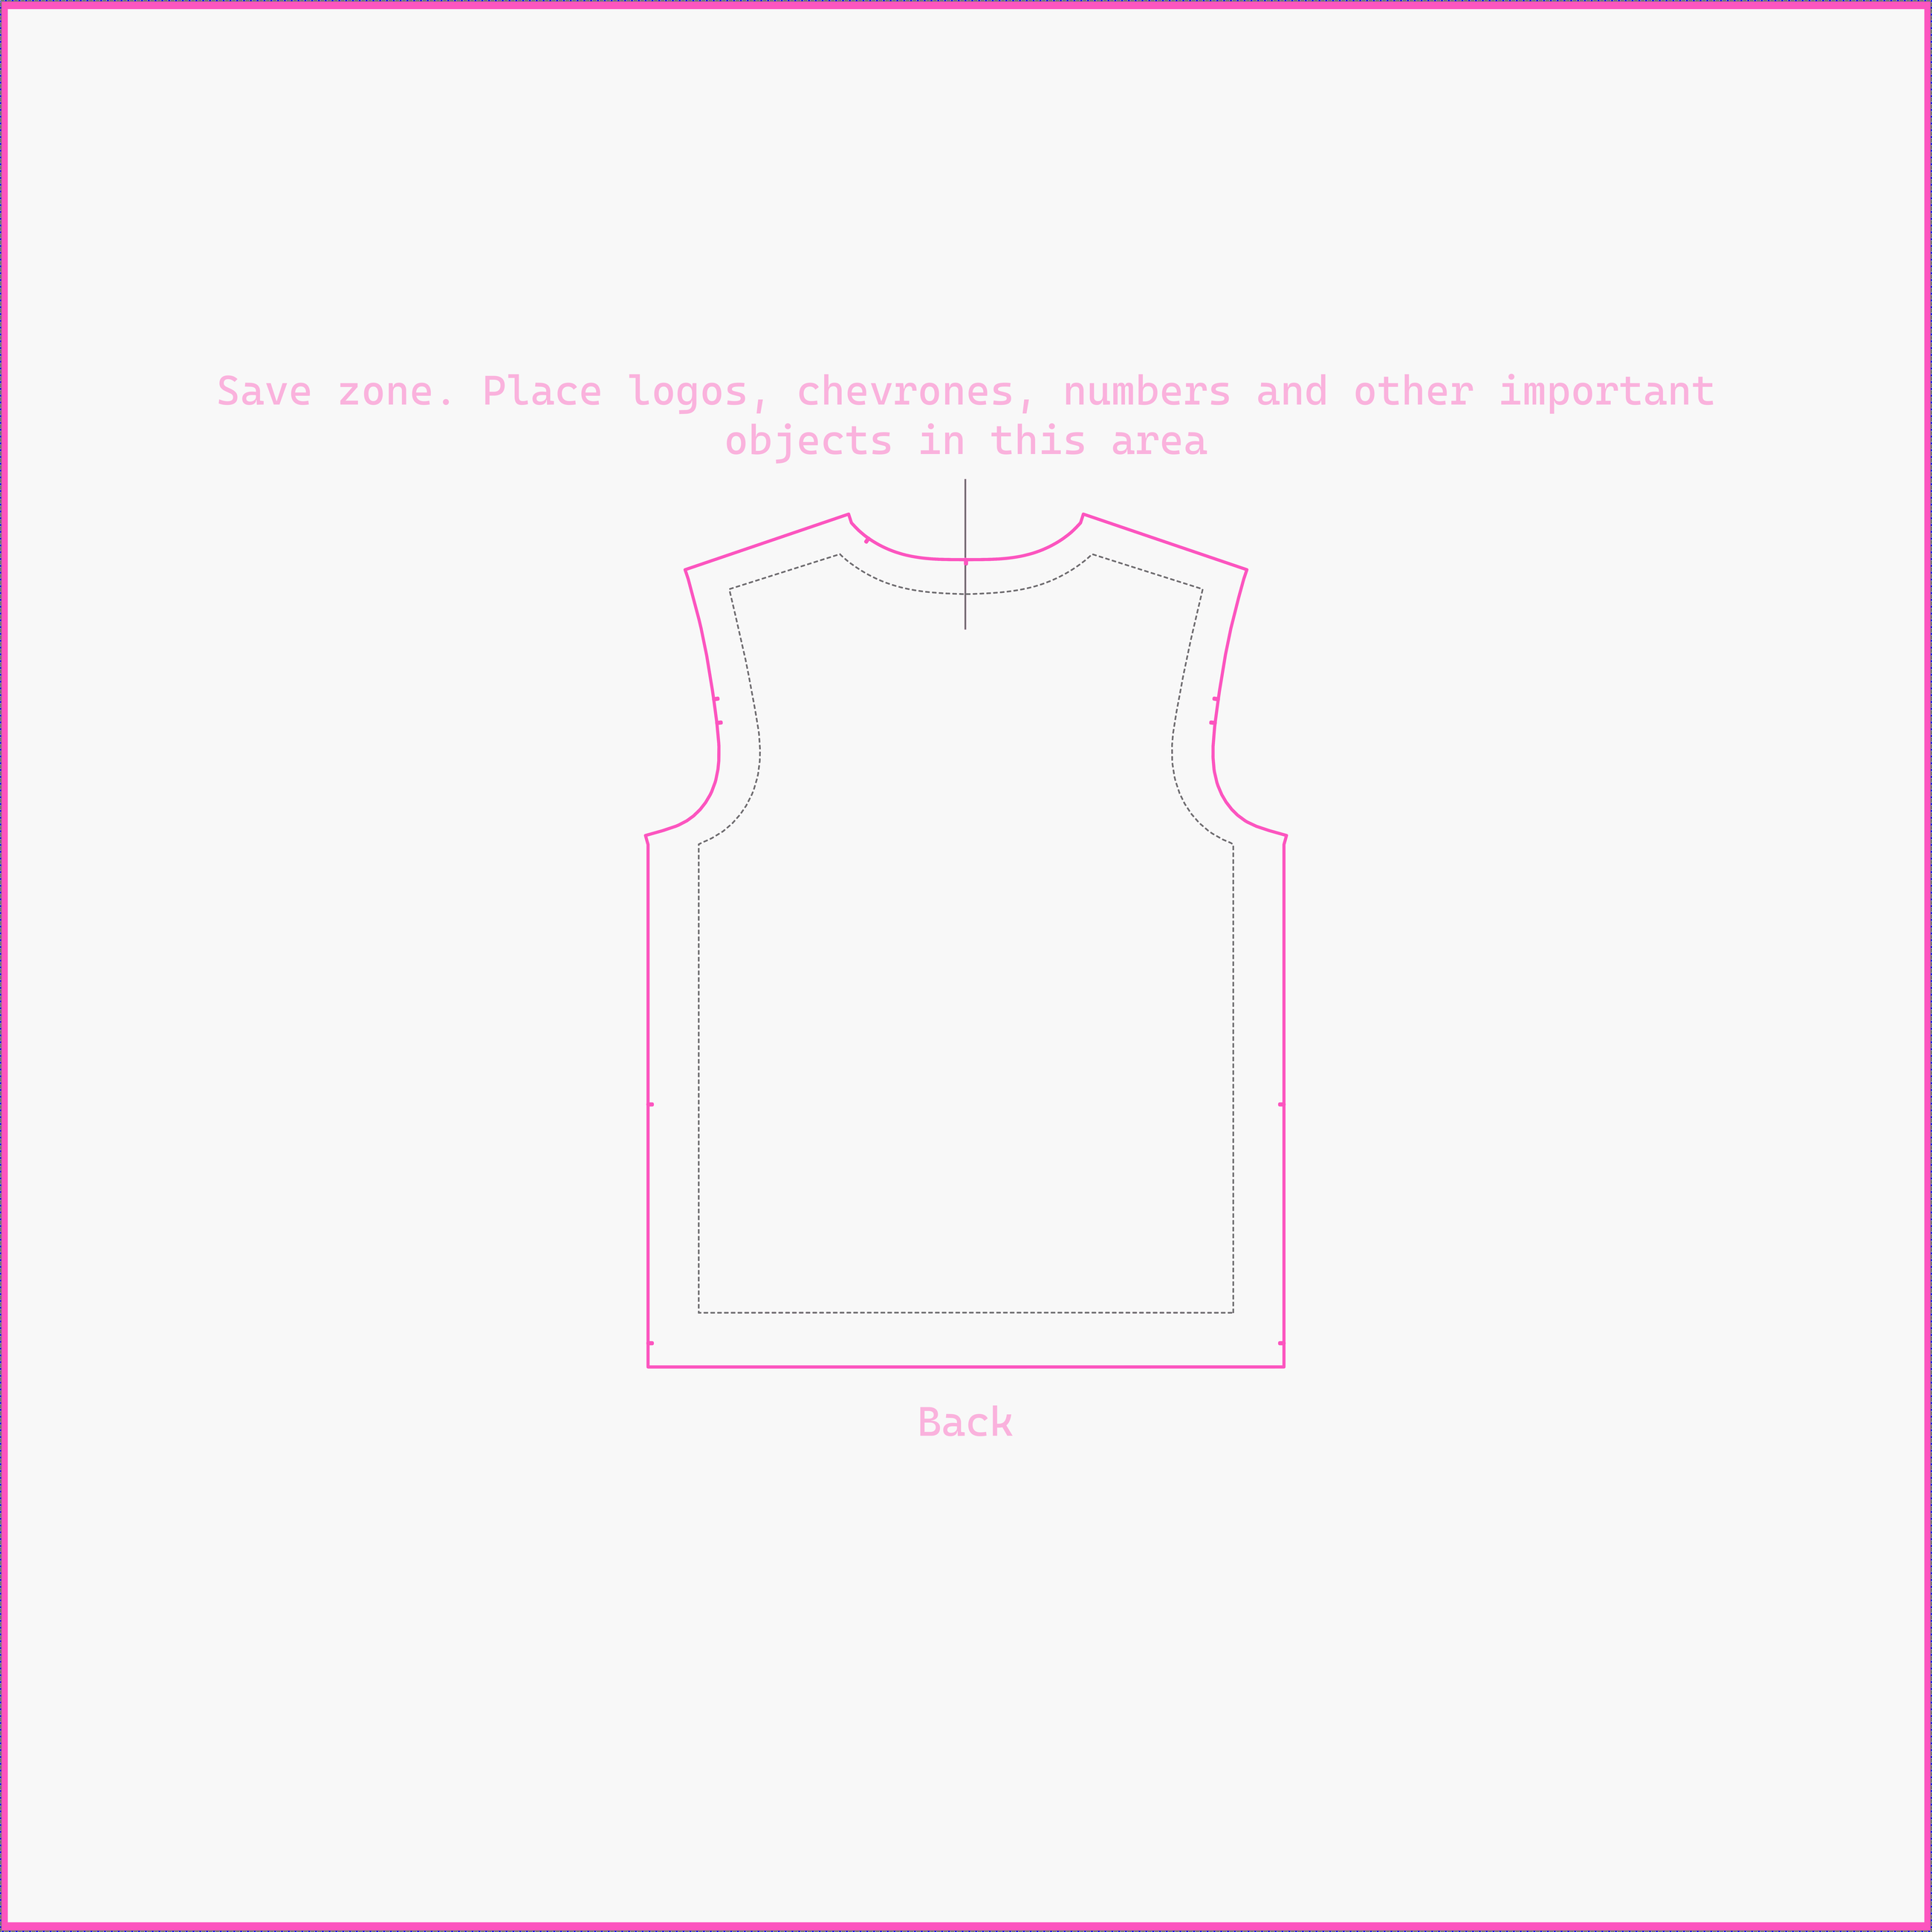
The print-ready back canvas. The back panel is 4096 × 4096 px at the center. Nothing here feeds a sleeve, so a single large image on the back survives intact.
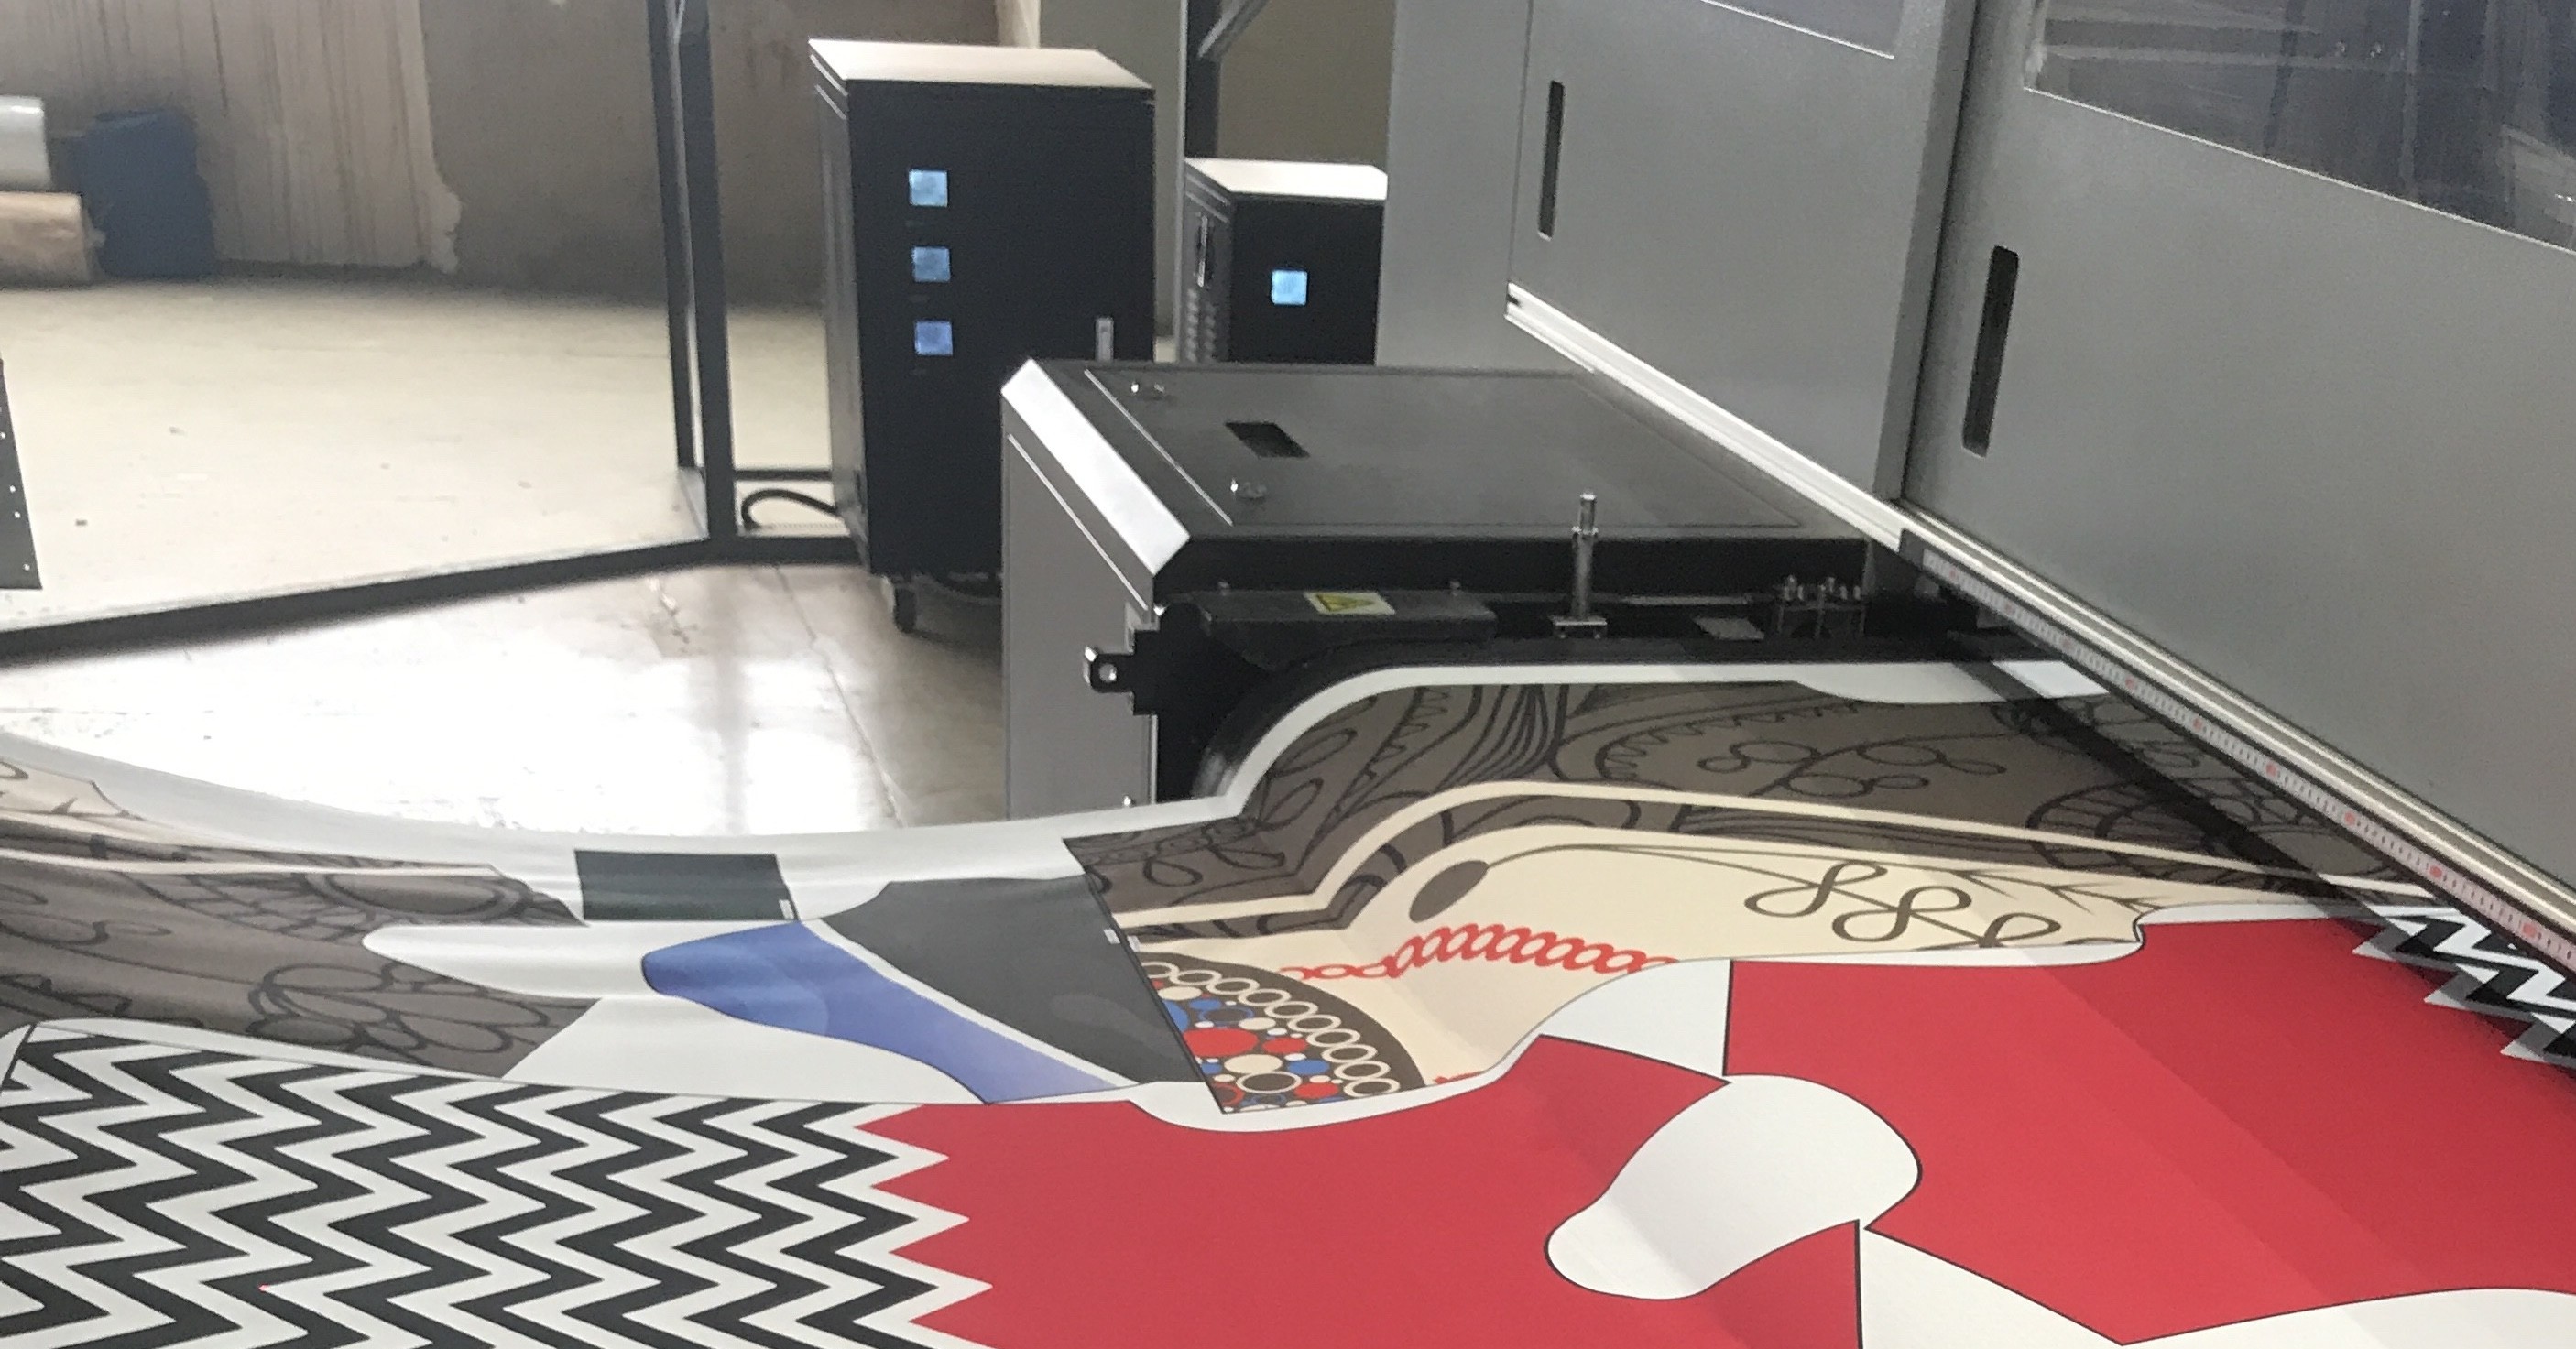
What the canvas becomes. The fabric comes off the press already printed, with the panels of several garments nested across it — this is the moment your file stops being a file.
The same headroom is what will let us put these files on more complicated garments as the catalog grows — anything with more pieces to cut.
Safe zone and seams — the honest part
Keep critical elements inside the central 3260 × 4096 px window of the front file: faces, lettering, anything that must not be clipped. That window maps to the chest and is the only area guaranteed to stay whole on the front panel.
Cutting fabric is a physical process: expect a shift of about ±2% where panels meet at the seams. Busy, organic patterns hide it completely; precise geometric alignment across a seam will not survive it. We won't promise pixel-perfect seam matching — nobody printing on real fabric honestly can.
Design accordingly: put detail in the center, let the edges be pattern, and treat everything within about 2% of a panel edge as bleed.
Color, in one line
Work in RGB and don't convert to CMYK “for print” — our eight-channel reactive process reproduces saturated tones that a CMYK conversion throws away. There is no white dye: white in your design is the undyed cotton showing through.
Not sure which path is yours?
If the idea lives on the chest and the rest can be pattern, send two square images and we will do the rest. If you want to decide what happens on the sleeves, build the print file.
Related: what reactive printing does to your artwork · designing for a whole garment · seamless patterns · designer FAQ